What Is a Lock Washer and How Does It Work?
A Lock Washer looks simple: a split ring, toothed disc, or curved spring beneath a bolt head or nut. Its purpose is not merely to “lock” the fastener. It helps maintain contact pressure when vibration, thermal cycling, or small surface movements challenge the joint.
John H. Bickford, a respected authority on bolted-joint design, cautioned, “A locking device cannot compensate for an improperly tightened joint.” That sentence deserves attention. A washer may add friction or create a spring effect, but it cannot repair poor torque, damaged threads, uneven clamping surfaces, or an incorrectly selected bolt. The hardware is only one part of the system.
Engineering guidance supports this wider view. NASA-STD-5020, NASA’s standard for threaded fastening systems in spaceflight hardware, treats preload, joint separation, vibration, and locking methods as connected design concerns. VDI 2230, widely used for high-strength bolted-joint calculations, also emphasizes preload and load distribution rather than relying on a single washer. The Industrial Fasteners Institute provides related dimensional and performance standards for washer products.
Real workshops reveal the gap between theory and practice. A mechanic may install a split Lock Washer on a painted flange, tighten the nut by feel, and expect permanent security. That expectation is weak. Surface coatings compress. Heat changes dimensions. Vibration finds small gaps.
The better question is not, “Does a Lock Washer work?” It is, “Will this locking method preserve clamp load in this joint?” Sometimes the answer is yes. Sometimes a prevailing-torque nut, wedge-locking washer, thread adhesive, or a redesigned joint deserves consideration. Even experts should inspect the actual failure evidence.
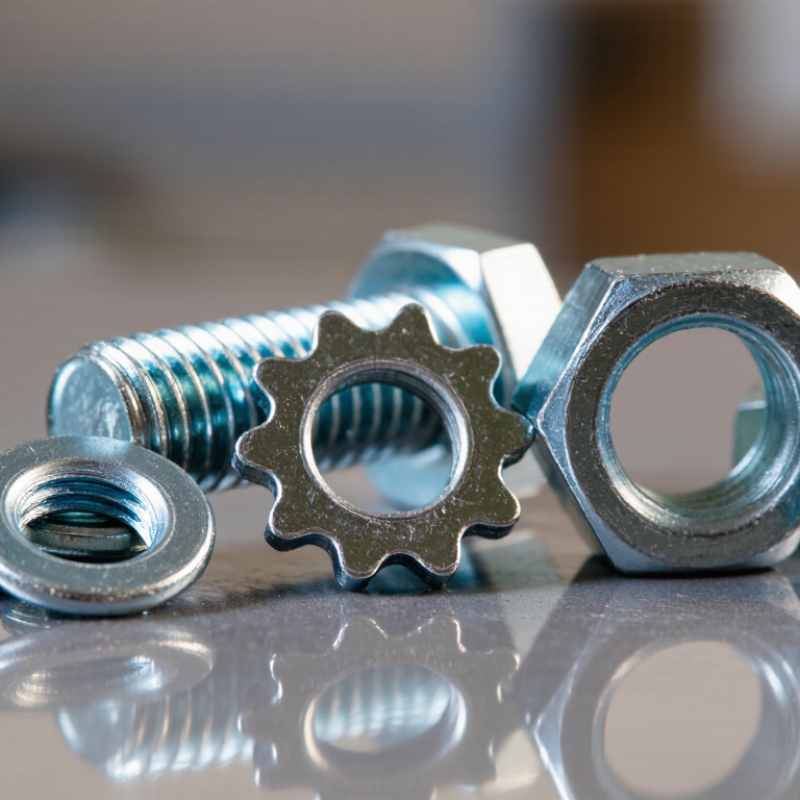
What Is a Lock Washer?
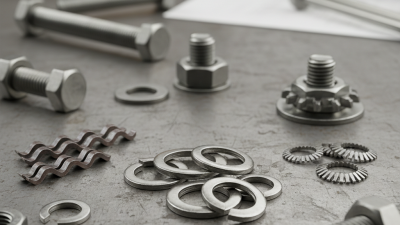
A lock washer is a small metal ring placed beneath a bolt head or nut. Its purpose is to resist loosening when a joint faces vibration, movement, or repeated loading. It is not a nut. Common designs include split, toothed, and wave washers, and each creates resistance differently. A split washer has a slight break and spring-like shape. When compressed, it pushes against the fastener and the joint surface. That added friction can help the connection stay tight.
A toothed washer uses sharp internal or external teeth to grip the mating surfaces. A wave washer applies spring pressure while allowing limited movement. In practical assembly work, the washer must match the fastener size and joint material. A loose fit can concentrate force on one edge. An overly hard tooth can mark a soft painted surface. The bolt still needs the correct tightening torque. A washer cannot repair poor contact, damaged threads, or an incorrectly fitted joint.
This is where lock washers are often misunderstood. They do not mechanically lock every connection, and vibration can eventually defeat their friction. A common workshop mistake is treating a split washer as complete protection. Better clamping force and a more suitable washer may be necessary. That mistake is useful. Engineers may check load, temperature, corrosion, and maintenance access before choosing a locking method. For critical assemblies, measured torque and routine inspection provide stronger evidence than appearance alone.
How Does a Lock Washer Prevent Fastener Loosening?
A lock washer is a small component placed beneath a fastener, usually a nut or bolt head. Its purpose is to resist loosening caused by vibration, movement, or repeated load changes. The washer works with the joint’s clamping force. It does not replace correct tightening.
A split lock washer compresses as the fastener tightens. Its angled ends create spring resistance and increase friction between the washer, fastener, and mating surface. Tooth washers use sharper edges instead. Their teeth press into the surfaces and resist rotational movement. This effect is useful on clean, firm materials, but it can mark painted or soft surfaces.
The real protection comes from keeping enough preload in the joint. If the bolt is under-tightened, the washer may not help much. If it is over-tightened, the washer can flatten and lose its intended action. In practical maintenance, dirty threads and uneven surfaces cause frequent problems. A washer can look secure while the joint remains loose inside. That assumption is too simple. High-vibration assemblies may require a different locking method, especially when safety depends on stable clamping force. Inspect the contact surfaces, use the correct washer size, and tighten the fastener according to the joint’s requirements. Rechecking after operation can reveal movement that visual inspection misses.
What Are the Main Types of Lock Washers?
What Is a Lock Washer and How Does It Work?
What Are the Main Types of Lock Washers?
Lock washers help maintain clamping force when joints face vibration, movement, or thermal changes. They work by adding spring force, friction, or physical locking points between the fastener and surface. They are not magic.
The split lock washer is widely recognized. Its angled gap creates a spring effect under compression. However, NASA-RP-1228 explains that joint preload and surface friction matter more than washer choice alone.
External-tooth washers use sharp teeth around the outside edge. These teeth grip the bearing surface and suit bolts with larger heads. Internal-tooth washers place their teeth inside the ring. They work well under small screw heads or recessed surfaces.
Serrated washers combine teeth with a flatter profile. They can resist rotation, but they may mark painted or soft materials. Tab washers use a bent tab against a nut or bolt head. They provide visible mechanical restraint during inspection. Conical, or Belleville-style, washers add controlled spring travel and help compensate for thermal expansion.
Material selection also matters. Stainless steel resists corrosion, while hardened carbon steel usually offers greater wear resistance.
The U.S. Department of Energy’s fastener guidance notes that friction can consume roughly 85–90% of tightening torque. Only about 10–15% creates bolt preload.
That figure deserves caution because surface finish, lubrication, and installation technique change it. ASTM F606/F606M testing also shows why washer hardness and load conditions must match the fastener assembly. A washer that looks suitable may still embed into a soft flange.
How to Choose the Right Lock Washer
A lock washer helps resist loosening by adding spring tension or biting into mating surfaces. Choosing one, however, requires more than matching the bolt diameter.
Start with the fastener size. The washer’s inner hole should fit closely without binding, while its outer diameter should support the joint surface. For ordinary steel assemblies, a split lock washer may suit light vibration. Serrated washers grip more aggressively, but they can scratch paint or plating. For heavily vibrating equipment, do not assume a lock washer is enough. A prevailing-torque nut or another engineered method may perform better.
Material selection matters. Stainless steel helps resist moisture and outdoor corrosion. Hardened steel usually handles higher clamping loads. Check the washer’s temperature range when heat is present. Also consider chemical exposure, surface coatings, and the bolt’s strength. A soft washer under a hard bolt can flatten and lose its function.
Use the specified tightening torque. Too little torque allows movement, while too much can crush the washer. I have seen a small washer leave a circular mark on a painted bracket after repeated tightening. That mark showed contact, not reliable locking. Test the actual joint when safety or vibration matters. A simple inspection after operation can reveal whether the washer is bending, cutting the surface, or staying flat. The right choice depends on the whole connection, not the washer alone.
How to Install and Maintain a Lock Washer
A lock washer works by adding friction and spring action between a fastener and its joint. Correct installation starts with clean, dry contact surfaces. Remove paint, oil, rust, and burrs. Seat the washer under the nut or bolt head, not between two loose washers. The teeth or split edge must contact a suitable surface. Do not guess.
Tighten the fastener with a calibrated torque wrench. ISO 898-1 identifies property class 8.8 steel fasteners with a nominal tensile strength of 800 MPa and a yield ratio of 0.8. That rating does not set the correct tightening torque. Joint material, lubrication, thread condition, and washer type still matter. ASTM F606/F606M provides recognized methods for checking fastener proof load, hardness, and tensile performance. These tests support safer selection, but they cannot repair poor assembly.
Maintenance should include a visual check for flattening, cracking, corrosion, or washer rotation. Recheck torque only when the engineering procedure permits it. Repeated tightening can damage threads or change preload. The NASA Fastener Design Manual, NASA Reference Publication 1228, emphasizes preload control and joint stiffness in vibration-resistant designs. A lock washer alone may not stop loosening under severe vibration. I have seen clean hardware fail because the joint was too flexible. That detail is easy to miss. Replace damaged washers, record inspection results, and question any assembly that shows fresh fretting marks or repeated torque loss.