Company News

How to Choose the Right Concrete Wall Anchors?

Choosing the right Concrete Wall Anchors begins with the wall, not the toolbox. Concrete strength, crack condition, thickness, edge distance, and moisture can change the connection’s performance. A sleek anchor may still be unsuitable.

ACI 318-19, Chapter 17, provides design provisions for anchors in concrete, including tension, shear, breakout, pullout, and pryout. Its guidance shows why a published load rating cannot stand alone. The rating depends on concrete strength, embedment depth, spacing, and installation quality. ASTM E488/E488M also defines tension and shear testing procedures for post-installed anchors. These tests offer useful evidence, but they do not recreate every jobsite condition. That distinction matters.

ICC-ES evaluation reports provide product-specific data, including approved base materials, installation limits, and allowable design values. Engineers and contractors should compare those values with the actual wall condition. A cracked wall near a corner is not equivalent to sound concrete in the middle of a panel. Nor is a dusty, oversized hole equivalent to a drilled hole cleaned according to the manufacturer’s instructions. Small details can decide large failures.

This guide explains how to evaluate Concrete Wall Anchors by load type, anchor material, embedment, corrosion exposure, and installation method. It also considers expansion, screw, and adhesive systems. Experience suggests that selection errors often begin with incomplete information. I have seen specifications focus on diameter while ignoring edge distance and curing conditions. That approach looks efficient, but it deserves reconsideration. Reliable anchor selection combines standards, verified test data, field measurements, and careful installation records.
How to Choose the Right Concrete Wall Anchors?

Types of Concrete Wall Anchors and Their Typical Applications

Choosing a concrete wall anchor starts with the wall, not the package label. Concrete density, cracking, edge distance, and load direction all matter. A light picture frame may need a sleeve anchor. A handrail or storage bracket needs a more deliberate design.

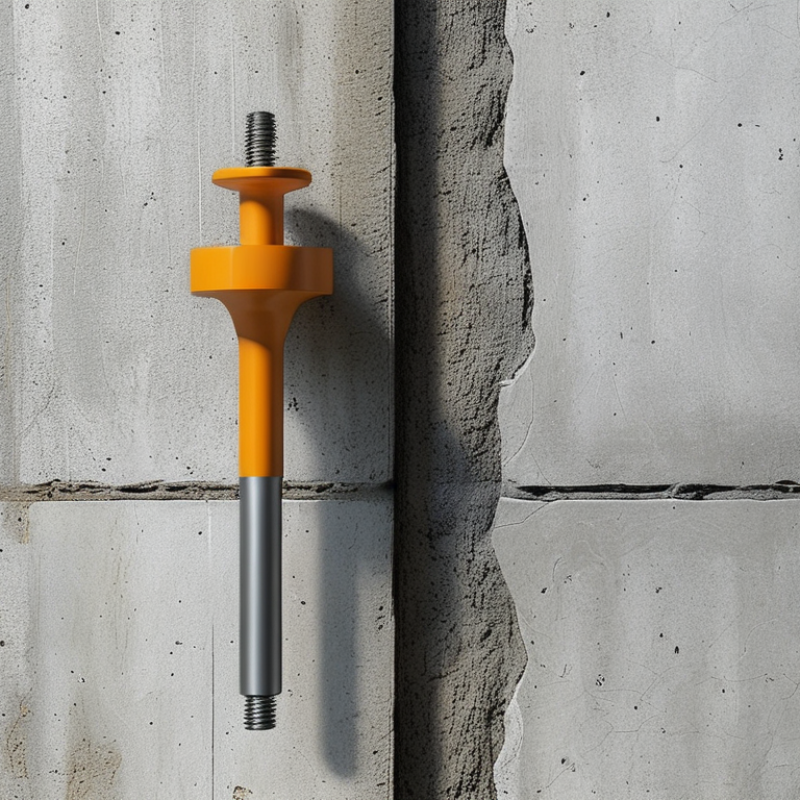
Mechanical expansion anchors suit solid concrete and predictable, moderate loads. They expand against the drilled hole and work well for plates, brackets, and equipment supports. Wedge anchors usually need deeper embedment and careful hole cleaning. Sleeve anchors tolerate some base-material variation, but their capacity can fall near edges. Concrete screws are practical for lighter fixtures and repeated installation. They are fast. They are not universal.

Adhesive anchors use a threaded rod and resin-filled hole. They perform well when embedment depth, curing time, and hole preparation are controlled. Moisture and dust can quietly reduce reliability. On site, a clean-looking hole may still contain drilling powder. That is an easy mistake. ACI 318-19 Chapter 17 evaluates seven major anchor failure modes, including steel failure, concrete breakout, pullout, and pryout. ASTM E488/E488M provides static tension and shear test methods, while ICC-ES AC193 addresses mechanical anchors in cracked and uncracked concrete. These documents support capacity decisions, but they do not replace project-specific engineering. Check the actual load, edge distance, spacing, and installation torque before drilling.

Assessing Wall Material, Load Weight, and Installation Conditions

How to Choose the Right Concrete Wall Anchors?

Assessing Wall Material, Load Weight, and Installation Conditions

Start by identifying the wall material, not just its appearance. Solid concrete, hollow block, brick, and cracked concrete require different anchor designs. Tap the surface and inspect exposed edges for voids or fractures. A dense wall may accept expansion anchors, while hollow sections often need specialized sleeves or chemical fixing systems. Never assume every grey wall is solid concrete.

Calculate the real load before selecting an anchor. Include the fixture, stored items, vibration, and occasional impact. A shelf holding tools needs more capacity than a light picture frame. Check the anchor’s rated tension and shear values, then allow a sensible safety margin. For heavy or overhead loads, seek professional structural advice. A clean installation can still be unsafe when the base material is weak.

Tips: Mark the hole away from edges and joints. Use the specified drill diameter and depth. Remove dust with a brush or vacuum. Dust matters. Keep the drill straight, and avoid enlarging the hole by repeatedly correcting your angle. Check moisture, temperature, and access before installation. Wet or frozen concrete may reduce performance for some fixing systems. Tighten gradually with a calibrated torque tool when required. I have seen anchors fail because installers trusted feel instead of measured torque. Recheck the fixture after loading; small movement deserves investigation, not dismissal.

How to Choose the Right Concrete Wall Anchors?

Compare anchor systems against common wall materials and installation conditions. The scores are engineering screening indicators from 1 to 5, not certified load ratings. Final selection must consider the actual load, embedment depth, edge distance, concrete condition, and the anchor manufacturer’s technical data.

Higher scores indicate better general suitability. Concrete screws and expansion anchors are commonly used in solid concrete, while hollow-wall conditions generally require toggle-style or approved masonry anchors. Adhesive anchors can perform well in cracked or uncracked concrete when the hole is correctly cleaned and the product is approved for the specific moisture condition.

Matching Anchor Design to the Required Load and Fixture

Choosing a concrete wall anchor begins with the fixture’s actual load, not its appearance. A light cable tray needs a different design from a suspended cabinet or handrail. Record dead load, live load, impact, vibration, and the number of anchors sharing force. Then separate tension from shear. A wall-mounted bracket may pull outward at its top while sliding downward at its base. Both actions matter.

ACI 318-19 Chapter 17 treats concrete breakout as a design limit, not an afterthought. Its strength-reduction factor for concrete breakout in tension is commonly 0.65. That margin reflects uncertainty in cracking, geometry, and installation. Use the report values, not optimistic assumptions. ICC-ES AC193 and ACI 355.4 qualification programs also distinguish cracked and uncracked concrete performance. A suitable anchor must match the wall condition, embedment depth, edge distance, and spacing tested in those evaluations.

A practical example helps. For a 450-kilogram fixture, four anchors do not automatically carry 112.5 kilograms each. Eccentric loading shifts force toward the outer anchors. Thin sections, nearby edges, and reinforcement can reduce capacity further. ASTM E488/E488M testing measures pullout behavior, displacement, and failure mode, so those results deserve careful review. I have seen clean calculations fail because dust remained in the hole. Installation is part of the design. Torque must be controlled, drilling depth verified, and damaged concrete rejected. A perfect spreadsheet cannot repair a weak substrate. Sometimes the safest choice is simply a deeper anchor or a larger base plate.

Preparing the Wall and Installing the Selected Anchor Safely

How to Choose the Right Concrete Wall Anchors?

Preparing the wall correctly matters as much as choosing the anchor. Before drilling, identify the concrete type, wall thickness, expected load, and nearby edges. Use a scanner to locate reinforcement, wiring, and concealed pipes. ACI 318-19 emphasizes embedment depth, edge distance, spacing, and concrete strength in anchor design. Do not guess these values. That shortcut can fail.

Clean holes thoroughly. Blow out dust, brush the sides, and repeat the process. Dust can reduce contact between the anchor and concrete. Use the drill diameter and depth specified in the installation instructions. ICC-ES AC193 evaluates mechanical anchors for concrete, including tension, shear, cracked concrete, and installation performance. Select an anchor with tested suitability for the actual wall condition. Never mix installation methods casually. Over-tightening can damage the anchor or crush the surrounding concrete. Practice helps, but careful measurement matters more.

After installation, inspect the anchor, washer, fixture, and concrete surface. Look for cracks, movement, tilted hardware, or incomplete seating. Apply the specified torque with a calibrated wrench when required. OSHA and Bureau of Labor Statistics data recorded 395 fatal construction falls in 2022, among 1,069 construction fatalities. That figure is not an anchor-specific failure rate, but it shows why secure wall-mounted equipment deserves serious attention. I still find rushed cleaning to be a common weakness. Small errors remain hidden until the load changes.

Checking Anchor Performance and Avoiding Common Installation Errors

How to Choose the Right Concrete Wall Anchors?

Anchor performance depends on more than diameter and load rating. ACI 318-19, Chapter 17, requires separate checks for tension, shear, concrete breakout, pullout, and edge distance. These checks matter near corners, joints, and thin wall sections. ASTM E488/E488M evaluates anchor strength through tension and shear testing. However, laboratory results assume controlled concrete quality and correct installation. Field conditions are rarely so polite.

A reliable selection process starts with the actual wall. Confirm concrete strength, thickness, reinforcement, anchor embedment, and expected load direction. ICC-ES AC193 qualification criteria include cracked and uncracked concrete, repeated loading, and installation sensitivity. Clean the hole carefully. Dust can reduce effective contact. Keep the drill perpendicular, and avoid enlarging the opening during insertion. Torque matters too. Under-tightening can leave movement, while over-tightening may damage the concrete or anchor. A perfect-looking installation can still be structurally weak.

Tips: Use a calibrated torque wrench and record the installer, date, anchor type, hole depth, and torque. Inspect spacing and edge distance before drilling. For overhead or safety-critical work, request proof testing by a qualified professional. Do not rely only on the package rating. The supporting concrete may govern the result. Recheck assumptions when the wall is old, cracked, hollow, or exposed to vibration. Some mistakes are obvious. Others appear months later.

How to Choose the Right Concrete Wall Anchors? - Checking Anchor Performance and Avoiding Common Installation Errors

Anchor Type Suitable Concrete Condition Typical Diameter Range Typical Embedment Range Load Behavior Main Installation Requirements Common Errors to Avoid
Wedge Expansion Anchor Sound, cracked or uncracked concrete when the anchor has the required approval for the condition Approximately 6–20 mm Commonly about 50–125 mm, depending on diameter and design High capacity for static tension and shear when correctly embedded and torqued; expansion force can reduce performance near edges Drill to the specified diameter and depth, clean the hole, install the washer and nut, and apply the specified torque with a calibrated wrench Insufficient embedment, incorrect hole diameter, inadequate hole cleaning, over-torquing, and installation too close to an edge
Sleeve Anchor Primarily uncracked concrete and light-to-medium-duty masonry or concrete applications Approximately 6–16 mm Commonly about 40–100 mm Moderate tension and shear capacity; generally more sensitive to edge distance and concrete quality than bonded systems Use the specified drill bit, clean loose dust, set the anchor through the fixture, and tighten to the stated torque Using the wrong sleeve length, failing to seat the sleeve fully, drilling into a weak joint, and tightening before the fixture is aligned
Concrete Screw Anchor Sound concrete and some approved masonry substrates; suitable for removable or adjustable fixtures Approximately 4.5–14 mm Often about 25–75 mm, subject to the specific approved system Good practical performance for light-to-medium loads; capacity depends strongly on thread engagement, concrete strength, spacing, and edge distance Use the specified drill size, drill deeper than the required embedment, remove dust, and drive without exceeding the installation limit Reusing a damaged screw, driving at excessive speed, stopping before full thread engagement, and using an oversized hole
Adhesive Anchor with Threaded Rod Cracked or uncracked concrete when the adhesive system is specifically approved for that condition Commonly M8–M24 threaded rods Often about 8–20 rod diameters; the approved design may require more or less High tension capacity is possible, with no expansion pressure; performance depends on concrete strength, bond quality, hole cleaning, and curing Brush and blow the hole according to the approval instructions, inject from the bottom, rotate the rod into place, and observe the full cure time Poor hole cleaning, injecting into a wet hole when not permitted, trapped air, moving the rod during curing, and applying load too early
Drop-In Internal-Thread Anchor Mainly uncracked concrete for flush-mounted, removable fixtures Commonly M6–M16 internal threads Usually about 25–65 mm, depending on anchor size Moderate to high capacity in approved applications; performance depends on correct setting depth and full expansion Drill the specified depth, clean the hole, insert the anchor, and use the correct setting tool to expand it fully Failing to set the anchor completely, using a bolt that is too short, leaving dust in the hole, and confusing anchor depth with bolt length
Performance Check What to Verify Why It Matters
Concrete Strength and Condition Confirm the concrete strength, age, cracking condition, reinforcement location, and presence of voids or honeycombing Anchor capacity is reduced in weak, damaged, cracked, or poorly consolidated concrete
Edge Distance and Spacing Measure the distance from the anchor to concrete edges and between adjacent anchors Small edge distances and close spacing can cause concrete breakout or reduce group capacity
Hole Diameter and Depth Use the bit diameter and drilling depth specified for the selected anchor An oversized or shallow hole can prevent proper expansion, thread engagement, or bond development
Hole Cleaning Remove drilling dust using the approved blow-brush-blow or equivalent procedure Dust acts as a bond breaker and can prevent mechanical components from seating correctly
Torque and Setting Check the specified torque, setting tool, installation depth, and thread engagement Under-torquing may leave the anchor loose, while over-torquing can damage the anchor or concrete
Load Verification Compare tension and shear demand with the approved design capacity, including safety factors and combined loading Published capacity is not universal; it changes with concrete strength, embedment, spacing, edge distance, and load direction

Note: The dimensional ranges above are typical field ranges for comparison only. Final anchor selection and allowable loads must be based on the applicable design standard, project drawings, substrate conditions, and the selected anchor system’s approved technical data.